Video Choreographies6 minutes

Learn the Savage Dance: Keara Wilson's Accents

By Bernhard De LucaUpdated

In short
  • Keara Wilson's Savage Challenge goes with Megan Thee Stallion's original song, not the later remix.
  • Learn the arm sequence in short sections of the lyrics, then add the body accents from the same video version.
  • Hit each target position on its lyric cue and prepare the arm change in advance.
  • Connect adjacent sections slowly before dancing the whole challenge at the original tempo.

A pose is easy to copy. The subtle transition to the next one is harder: that's where you often run out of time in this short challenge.

What you need to practice

  • Keara Wilson's challenge video to the original song
  • Original recording of Savage by Megan Thee Stallion
  • Video playback with pause and slow-motion options
  • Open space for side steps and outstretched arms
  • Comfortable clothing and sneakers with good grip

Text cues keep the original sequence together

Keara Wilson created her Savage Challenge in 2020 to a song by Megan Thee Stallion. The attribution matters: an arbitrary clip with the same music does not have to show the same choreography. Later imitations sometimes change hand shapes, movement size or transitions. The choreographies to the remix with Beyoncé are therefore not a model for this tutorial.

Use a single reference video for sequence and sides. The words of the chorus serve as anchor points: for example, “classy,” “bougie” and “ratchet,” then later “sassy,” “moody” and “nasty.” These are learning cues, not an invitation to invent a separate mime gesture for each word. Follow the movement Wilson actually shows in the original clip you chose.

An accent consists of a lead-in, a clearly recognizable endpoint and a release afterward. If you copy only the endpoint, you miss the transition. Your arms may already be moving while your knees or torso are still finishing the previous accent. This overlap explains why six individually successful positions still do not make a fluid sequence.

When learning the Hand Jive in sections, it also helps to memorize short sections separately. For a cover course for a song of your choice, the exact video version is just as important. Here, Wilson’s original remains your consistent reference.
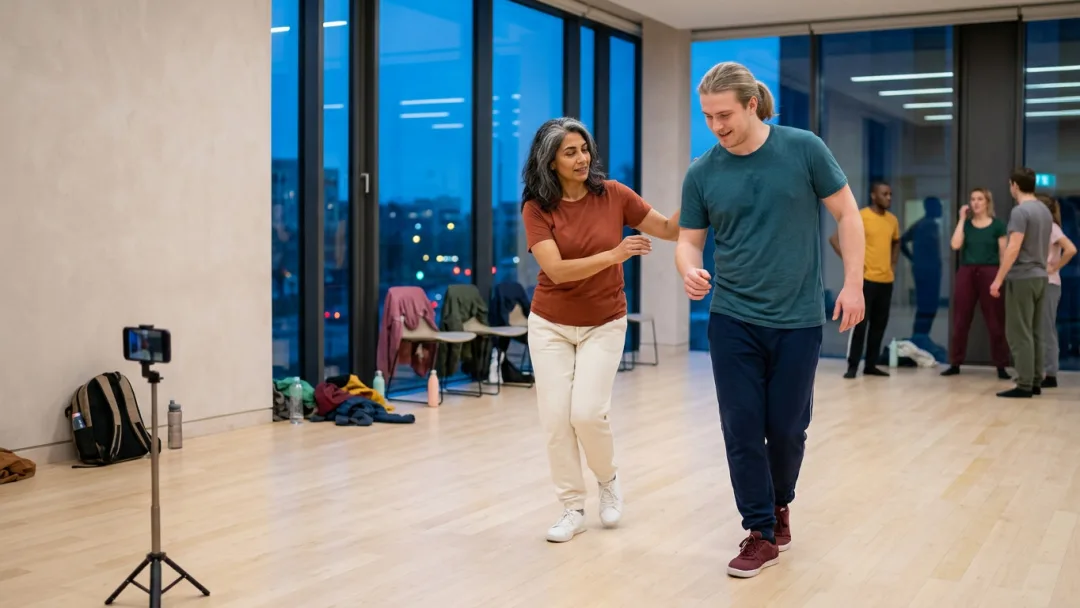
A fixed camera angle makes it clear whether your upper body keeps drifting unintentionally after the accent.

Set up the challenge in seven steps

  1. Set the Original Clip and Listening Point

    Open Wilson’s original clip and listen to the chorus excerpt being used once without dancing along. Note the first word that coincides with the start of the visible sequence and where the final movement ends. That way, you won’t practice a different excerpt or an extra intro.

  2. Clearly identify the sides in the image

    Pause at an asymmetrical arm position and decide whether you’re learning in mirror image or using the same sides of your body as Wilson. Say your own starting side out loud and stick with that choice for every repetition, even if your phone camera later mirrors your preview.

  3. Mark the first text block with your arms

    Play the first block slowly, up to the third text cue. Copy the hand shape, elbow height, and direction of movement from the clip, initially keeping your lower body still; pause briefly at each target position and check whether you can still match it to the correct word.

  4. Add the second arm section

    Learn the next three text markers in the same way, without dancing through from the beginning yet. Pay special attention to the starting position of your hands: the first movement in this section starts from the ending position of the previous one, not with your arms hanging loosely by your sides.

  5. Layer in the body accents underneath

    Play both sections again and now focus only on your knees, pelvis, and chest. Add the visible weight shifts and short body impulses to your arms, starting small; you should be able to release each accent again without locking your knees or arching your lower back.

  6. Link the transitions and the ending

    Practice the last movement of each block together with the first movement of the next. Then add the remaining closing phrase from the clip. The transition works when no extra step or hurried hand reset appears between the markers.

  7. Record a run-through at the original tempo

    Dance the full excerpt to the original recording and film yourself with your hands and feet visible. First, focus only on the timing: Are the accents landing late? Make their movements smaller and repeat the affected transition instead of dancing the entire routine faster.

Keep accents clear, keep paths short

Like this

  • Keep your fingers relaxed between gestures
  • Keep your standing leg stable during sideways movements
  • Refocus your gaze after a brief head accent
  • Keep your shoulders relaxed at the end of the movement

Not like this

  • Clench your hands tightly throughout the entire sequence
  • Lean your upper body over the outer edge of your foot
  • Throw your head back forcefully
  • Raise your shoulders toward your ears to make your arm movements more pronounced

Mark your practice session as complete

Before playback

Preparation

After the Sequences

Connection

After recording

Review

Frequently Asked Questions

  1. You do not need any specific dance experience, but you should be able to remember short sequences of movements one after the other. Start with your arms and keep your lower body still at first. If three lyric cues are already getting mixed up, shorten the section to two instead of adding even more body movement at the same time.

Hip Hop Classes for Short Choreographies

In a Hip Hop class, you can practice learning short movement sequences, even if Savage isn't part of the class curriculum.

View All Matching Classes

The next lyric cue lands in sync

On udansa connect, you’ll find people to practice short choreographies with. You can take turns dancing and observing whether the arm changes and lyric accents line up.

The next lyric cue lands in sync