Prop technique5 minutes

Practice arm movements with castanets and sustain the sound

By Bernhard De LucaUpdated

In brief
  • First, combine familiar castanet strokes with a small arm movement from waist height to just below your chest.
  • Keep the same finger movement as you raise and lower your arm, without gripping the castanets any tighter.
  • Practice slowly over eight counts and listen for missing, doubled, or noticeably changed strokes.
  • If the sound is lost, first make the arm movement smaller and add steps only after repeating it steadily.

A clean sound while standing can disappear as soon as your attention shifts to your elbows. You can keep this transition in check with a movement task so small that you notice the mistake while you're still playing.

What you'll need for the exercise

  • Properly fitted hand castanets that don't press on your thumb
  • A simple rhythm pattern you've already learned
  • A pain-free range of arm movement reaching below chest level
  • An open space and comfortable workout clothes
  • A metronome or steady, loud counting

Arm movement changes the conditions for playing

When you play with moving arms, your hand position and the load change. If you raise your shoulders, tense your thumb more or bend your wrist while doing so, your familiar finger movement may become smaller. A missed note is therefore not automatically a mistake in the rhythm pattern. It may happen precisely where you accelerate your arm or change its direction.

For this exercise, keep the sound pattern deliberately simple: use single strokes you have already learned, for example, alternating right and left for one stroke per count. The eight counts simply structure the practice sequence. They are not a prescribed compás for a particular palo. For now, leave out a Carretilla, new wrist circles and large overhead movements too.

Compare each repetition with arm movement to your sound with relaxed arms. Your right and left castanets do not have to sound the same. What matters is that each hand keeps its own clear tone. You can spread short practice sessions out with a practice plan between two classes. Don’t increase playing time at the same time as the range of arm movement: when gradually increasing the demands of dancing, this makes it easier to identify which change is challenging you.
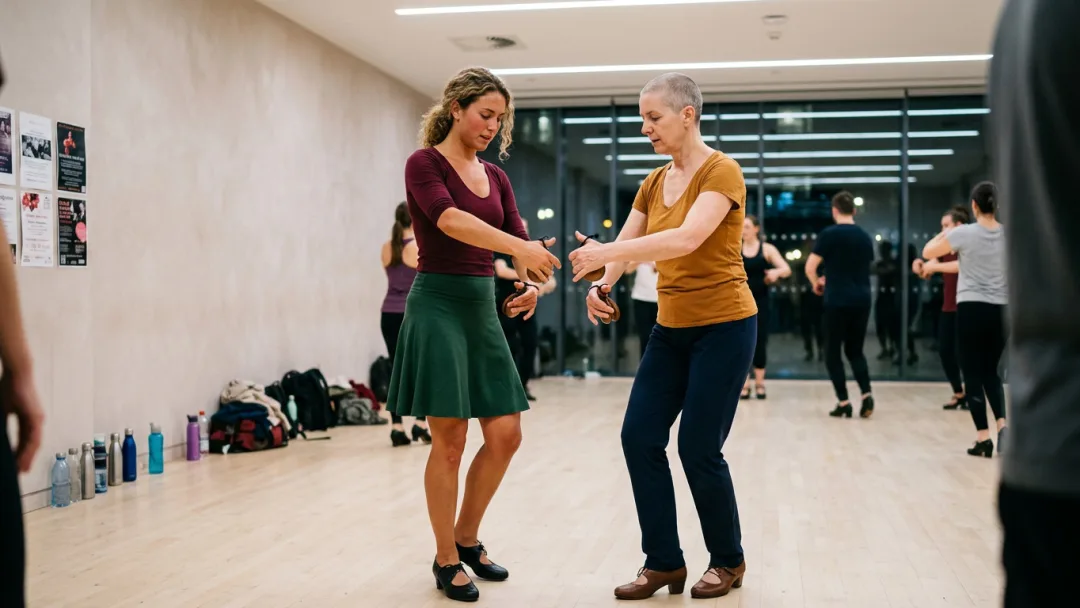
A lighter and a darker tone can remain different, as long as each hand responds reliably.

Connect the short arm movement to sound

  1. Keep the Starting Sound Steady

    Stand comfortably with soft knees and hold your hands in front of your waist without pressing your elbows against your body. Play your familiar single strokes for eight counts with your arms relaxed. Choose a tempo at which each stroke remains clear.

  2. Mark the arm path without striking

    Move both hands from waist height to just below your chest on counts one to four, then back on counts five to eight. Keep the castanets on, but silent. Keep the movement pain-free and avoid jerking when changing direction.

  3. Play through the sequence with one hand

    Repeat the same path with both arms, but play only with the right hand at its usual points in the beat sequence. Keep the left hand still. Pay special attention to the highest point: the finger stroke should remain just as free there as it is at the bottom.

  4. Add the other hand separately

    Now play only the left-hand beats while both arms follow the same path. Keep the tempo and range of motion the same. If one side is more difficult, reduce the range of motion for both arms instead of compensating for the weaker hand by squeezing harder.

  5. Bring Both Hands Together

    Reconnect right and left into the familiar sequence, for example, alternating one beat per count. Raise over four counts and lower over four counts. Repeat the sequence with a steady stance and listen for a gap at the top of the movement.

  6. Add a subtle weight shift

    Only add a small weight shift after stable repetitions: to the right while lifting, to the left while lowering. Keep your feet in place at first and avoid foot taps. Keep your upper body upright, without leaning sideways to follow the arm's path.

  7. Evaluate the run-through by ear

    To finish, run it through once with relaxed arms and once with moving arms at the same tempo. Compare the recordings or ask your practice partner to just listen. Note the count where you slip; that exact transition remains the focus for the next session.

Pinpoint sound issues instead of covering them up

Like this

  • If you make a mistake, repeat only the affected section of the path
  • For softer notes, release the extra pressure from your thumb
  • For double strikes, move through the turning point more slowly
  • If your shoulders are raised, lower the upper limit of the path

Not like this

  • After a slip-up, repeat the whole sequence faster
  • Make up for quieter tones by gripping tighter
  • Cover up double strikes with even more momentum
  • Keep to the upper limit of your range despite raised shoulders

Your control before, during and after practice

Before the first run-through

Start

After both hands are joined

Connection

To wrap up

Review

Frequently Asked Questions

  1. No, for this exercise, reliably learned individual strokes are enough. A continuous Carretilla would also involve a sequence of several fingers and make it harder to identify the cause of a sound error. So stick to the sequence you can play reliably with relaxed arms, even if it is very simple.

Hear the arm movement together

On udansa, you can find dance partners for a shared practice session. While you play, your partner can focus on the sequence of sounds without having to coordinate their arms at the same time.

Hear the arm movement together