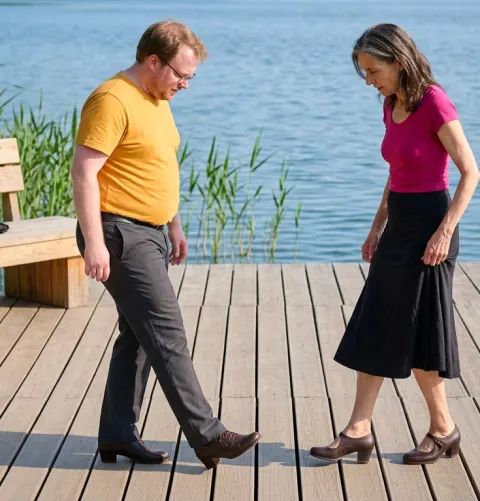
Turning Technique6 minutes

Learn a Flamenco Turn: Land Safely with a Small Impulse

By Mary De LucaUpdated

In short
  • You first learn an upright Flamenco turn with small turning steps instead of a fast full rotation.
  • You create a small impulse from contact with the floor and let your feet follow in the direction of the turn.
  • Your gaze follows a focal point without holding your head rigidly against your body.
  • You finish the turn with controlled foot contact and stand still without taking an extra recovery step.

A turn can look good while you’re moving, then fall apart when you finish. That’s why staying calm afterward matters when you practice too: you want to be free to choose which step comes next.

What you need for the exercise

  • Free space for small steps in all directions
  • Level dance floor with no sticky or slippery spots
  • Well-fitting dance shoes with a low, stable heel
  • Comfortable training clothes without loose accessories
  • A visible reference point at eye level

A small turning path makes the cause visible

To get started, practice an upright, stepping turn. Move around your own axis with small steps instead of forcing a full turn on a planted foot. This is a learning version, not a fixed form for every Flamenco school. The term Vuelta refers to a turn; how it is performed depends on the particular movement sequence.

A quarter circle is enough at first to observe the connection between impulse and arrival. If the momentum carries you past your target, the impulse was too strong for that path. If your shoe catches, you need a moving foot contact, not more force from your shoulders. A loaded knee must not twist against a foot that is stuck to the floor. Keep your arms relaxed and close to your body for this exercise, so you don't have to change several things at once.

You don't need music for your first attempts. Steady counting gives the movement structure, but it doesn't yet follow a particular Compás. The musical context, such as timing in Tientos, comes later. The gradual increase in dance intensity also applies here: first make your turning path longer while staying in control, then increase the tempo.

Even the distance between your feet at the end shows how much momentum you still have left.

Practice the upright turn step by step

  1. Warm up your feet and joints

    Walk around the room first and move your ankles and knees with small, relaxed steps. Add slow changes of direction without momentum until you can reposition your feet easily; strong stretching isn't necessary. If you experience pain or dizziness, don't attempt turns.

  2. Set a quarter-circle target

    For a right turn, choose a point to the right of your starting direction, roughly at eye level. Look at it beforehand, then return your gaze forward. Your first attempt ends there, not after a full turn, which keeps the distance manageable.

  3. Find a narrow starting stance

    Place your feet close together, but not touching, and keep your knees relaxed. Hold your arms calmly in front of your body and keep your shoulders relaxed. Shift your weight far enough to the left that you can lift your right foot for the first step.

  4. Keep the first turning step small

    Push off gently from your left foot and take a small step with your right in the new direction. As you place it down, point your right foot toward the quarter-circle target. Let your left foot turn with you instead of anchoring it to the floor; let your upper body follow without throwing your shoulders.

  5. Bring your gaze to the target

    Let your gaze leave straight ahead as soon as the turn calls for it, and direct it toward your chosen point. For this small movement, you don't need a quick head whip. Keep your head upright and let it turn without forcing it. You'll spot the target before you come to a stop.

  6. Bring the free foot in and stop

    Bring your left foot next to your right without crossing your feet or bringing them together with a bang. Set your foot down quietly and distribute your weight for a comfortable stance. Stand still for two calm counts and keep breathing; if you can only manage this with an extra step, reduce the momentum on your next attempt.

  7. Practice the other side and longer pathways

    Repeat it mirrored to the left. Only once both quarter turns end smoothly, connect small turning and closing steps into a half circle, then later a full circle. Set your endpoint beforehand and direct your gaze there without twisting your neck; don’t increase the tempo at the same time yet.

Address mistakes deliberately

Like this

  • If you overshoot the target, make the next impulse smaller
  • If you land too wide, take shorter steps
  • If your shoulders are pulling, keep your arms lower and steadier
  • If your shoe sticks, stop the attempt

Not like this

  • Trying to correct an overshot turn with an abrupt jerk
  • Placing the free foot far out to absorb momentum
  • Throwing the arms up to speed up the turn
  • Continuing to rotate the body over a planted foot

Check off your practice at each time point

Before your first attempt

Preparation

After the quarter turns

Control

At the End of the Exercise

Conclusion

Frequently Asked Questions

  1. No, to get started, you can practise a stepped turn with several small foot contacts. This makes the movement easier to control than a long turn on a single supporting foot. Other types of turns have different requirements; this learning version is intended to help you get oriented and finish the turn, not to replace every variation.

Keep turning with control

On udansa connect, you’ll find people to practice with. You can take turns turning and watching to see whether the final foot contact really brings you to a stop.

Keep turning with control