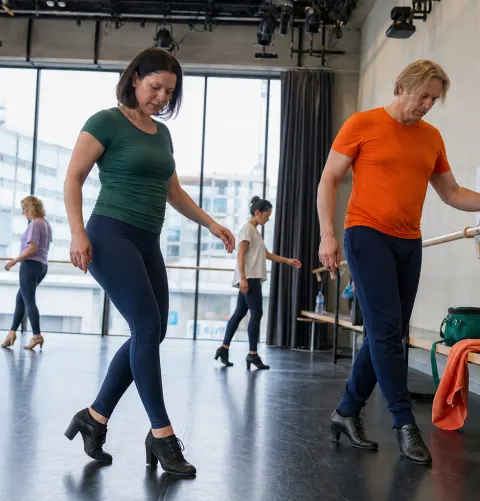
Training Preparation6 minutes

Heels Dance Warm-Up: Get your feet ready for heels

By Bernhard De LucaUpdated

In short
  • Start without pauses by marching gently, then actively move your feet and ankles.
  • Activate your calves with small, slow heel raises, without exercising to the point of fatigue.
  • Then put on your heels and initially put weight on both feet with hand support.
  • Finish your preparation with small knee movements and mark the choreography without big accents at first.

The first song shouldn't force your feet into a heel position before they've warmed up. A short warm-up creates a smoother transition from everyday shoes to choreography without using up the energy you need for the dancing itself.

What you need to prepare

  • Clear, level space suitable for your dance shoes
  • Stable chair or fixed barre for support
  • Your familiar heels that fasten securely
  • Freedom of movement for your feet and lower legs
  • Pain-free starting condition with no acute injuries

The position in heels needs a transition

In heeled shoes, your heel sits higher than the ball of your foot. This changes the starting position of your ankle, and your feet have to manage contact with the floor differently than when barefoot. Simply putting on your shoes does not warm up the muscles involved. So preparation starts with general movement and only later moves into the elevated position.

Active mobilization means moving your foot using your own muscles: pulling it in, extending it, and making small circles. You neither push it further with your hands nor aim for a maximum stretch. How dancing can improve your mobility is a different question from immediate preparation before a class.

The warm-up should get you ready to move, not exhaust your calves. The repetitions below are therefore a gentle introduction, not a required number or a strength test. Stay within a range of motion that you can control without swinging. Then bring the same calm approach to exertion into your shoes. Later in your training, it also helps to increase your dance workload gradually. Balance training on its own and assessing foot discomfort are not part of this short preparation sequence.

Changing shoes marks a new level of exertion, not a cue to go full speed right away.

From Flats to Heels in Seven Steps

  1. Get your whole body moving

    March gently in place for about one to two minutes without stopping, swinging your arms too. Place your feet down quietly and increase the pace only slightly, until you feel a little warmer and can still speak comfortably.

  2. Actively move your toes and the soles of your feet

    Sit on a chair with both feet flat on the floor. Raise and lower your toes five to eight times without curling them afterward; keep your heels on the floor. The movement can be small, as long as you do it consciously and keep your knees still.

  3. Mobilize your ankles

    While seated, lift one foot slightly, pull it toward you five times, then gently point it away again. Next, draw three small circles in each direction and switch sides. Keep your lower leg as still as possible, moving your foot without using momentum.

  4. Activate your calves with heel raises

    Stand barefoot with your feet hip-width apart and place one hand on a support. Slowly raise both heels a little six times, then lower them just as slowly. Keep your toes extended and your knees relaxed; end the set early if the movement becomes jerky.

  5. Move your knees over your feet

    Keep both heels on the floor and gently bend your knees forward five times. Your knees follow the direction of your toes instead of collapsing inward. Straighten up gently each time and make the movement smaller if a heel lifts off the floor.

  6. Put on heels and bear weight with support

    Put on the shoes while seated and fasten them. Stand up with support from your hands, with the balls of both feet and the heel tips on the floor. Bend and straighten your knees slightly four times; keep the shoes planted as you get used to the elevated heel position.

  7. Mark the beginning of the choreography

    Mark the start of your familiar sequence once, slowly, with short steps and small arm movements. Leave out turns, low positions and strong accents for now. If the connection stays steady and you don’t tense up, gradually expand the movement during guided practice.

Adjust your range of motion appropriately

That's right

  • Make circles with your feet from the ankle
  • Raise your heels slowly and only as far as you can control
  • Keep your toes long and relaxed when putting weight on them
  • Mark the first pass with small movements

Not like this

  • Swing your entire lower leg to make larger circles
  • Spring onto the balls of your feet and let your heels drop
  • Curl your toes tightly for a false sense of grip
  • Start right away with deep positions and strong accents

Your preparation checklist

Before the First Move

Set Out

Before Changing Shoes

Mobilized

Before the full run-through

Apply

Frequently Asked Questions

  1. Plan for about five to eight minutes for this short foot preparation. This is a guideline, not a guaranteed minimum duration. If you have been sitting for a long time, you may need more general movement. This sequence also does not replace the warm-up your dance class needs for your hips, core, and shoulders.

Head to your dance class with preparation

On udansa connect, you’ll find people for regular dance practice. Make plans so there’s also time for your warm-up before practicing together.

Head to your dance class with preparation