Footwork5 minutes

Rock'n'Roll kick ball change: Connect three actions with confidence

By Mary De LucaUpdated

In short
  • In a Kick-Ball-Change, a kick is followed by a quick, weighted ball-of-the-foot step and a weight change to the other foot.
  • For this isolated exercise, count the kick on “1,” the ball on “and,” and the change on “2.”
  • If you start with a left kick, briefly put your weight on your left foot, then shift it back to your right.
  • Practice without music first, then combine the three actions in a steady rhythm.

The stumbling block is often the gap between a visible foot contact and a foot actually taking weight. When you consciously notice this small in-between action, three movements you thought of separately become one connected opening sequence.

What you need for the exercise

  • A level, clear floor with no rugs that can slip
  • Comfortable, flat shoes with a secure fit
  • A small kick you can perform without pain
  • A stable stance on your right leg
  • A metronome that can be set to a slow tempo or suitable music

A contact only counts when it takes weight

“Ball” here means the ball of the foot, not an extra kick. After the left kick, the left foot comes down near the standing foot and briefly takes weight. Only then can the right foot be freed for the following change. A tap without taking weight is not yet a Ball Change. The contact can be brief, but it needs a clear purpose: enabling the transfer to the other foot.

In this exercise, the three actions do not each get a beat of equal length. “1 and 2” falls on two consecutive beats, with an intervening count. At first, say each word out loud; this keeps the “and” in place instead of letting it disappear between the kick and the finish. Counting is a guide to the sequence, not an instruction to perform the kick jerkily.

The distinction between foot position and weight-bearing is also useful for the Sailor Step without a turn, although its step sequence is different. For another perspective on feeling a complete transfer, the guide to weight transfer in Slowfox can help, without asking you to adopt its movement style. Here, your practice goal stays narrowly focused: kick with the left, briefly put weight on the left, then carry your weight on the right again. The complete Rock'n'Roll basic step sequence and the execution of the individual kick are not part of this lesson.

You can see the contact in the shoes, and tell which foot is carrying the weight by the opposite foot becoming free.

Putting the opening together on “1 and 2”

  1. Get into the starting position

    Stand with your weight on your right foot and keep your left foot free. Look straight ahead, keep your arms relaxed and stay in place; your left foot should be able to move without you first shifting to the right.

  2. Go through the three positions without a beat

    Do a small kick with your left foot, then place the ball of your left foot close beside your right foot and briefly transfer your weight onto it. Then put your right foot down with your weight on it again. Pause between each movement so you can distinguish the contact from the weight transfer.

  3. Linking the Ball Change on Its Own

    Start by leaving out the kick and briefly transfer your weight from your right foot to the ball of your left foot, then back to your right. Your right foot should feel light in between; at the end, your left foot is free again, so you don't end up with your weight on both feet.

  4. Connect the kick with the switches

    Bring the small left kick back in beforehand and slowly count “1 and 2.” Make the ball-of-foot contact on “and” between the numbers, and finish on the right on “2”; then pause before using the same starting side again.

  5. Repeat to a steady beat

    Use a slow metronome: kick on one click, ball in between, change on the next click. Then let two clicks pass to reset. Increase the tempo only when you end in the starting position without a rushed extra contact.

  6. Coordinate the Start Together

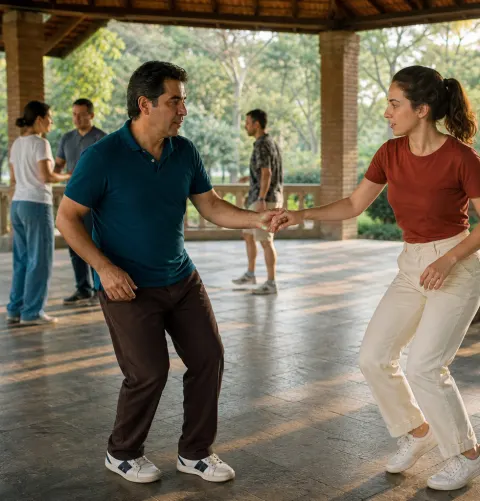
    Stand facing each other with some space between you and count in together before you start. Each person uses their agreed starting side and supports their own weight; eye contact replaces pulling on each other’s hands, while you repeat only this opening sequence.

These adjustments make all the difference

Like this

  • Place your left foot back close to your supporting foot
  • Place your weight lightly and with control on the ball of your foot
  • If you make a mistake, stop and start again
  • Use your arms freely to maintain your balance

Not like this

  • Place your left foot far forward
  • Stamp down on the ball of your foot
  • Compensate for a mistake with extra steps
  • Pull on your partner to regain your balance

Your session to tick off

Before the first run-through

Preparation

After the slow repetitions

Coordination

At the End of the Session

Review

Frequently Asked Questions

  1. Yes, you can mirror the isolated exercise and start on the right. You then start with your weight on the left, kick with the right, briefly transfer your weight to the ball of your right foot, and shift back to the left. This is a coordination exercise, not a rule about which side to start on in every partner sequence.

Practice the opening together

On udansa, you can find dance partners to repeat short Rock'n'Roll practice sequences with. Agree on a relaxed start so you can both hear the counts between beats.

Practice the opening together